Microcontroller Breakout Prototype
The breadboard circuit pictured below is a prototype for a breakout board for the PIC32MX170F256B microcontroller. Together with this MCU is a USB to UART converter, voltage regulator, inertial measurement unit (IMU), digital-to-analog voltage converter, LCD, Neopixel programmable LEDs, and IO expander chip. All code for this project can be found here on my GitHub page: https://github.com/nmarks99/ME433
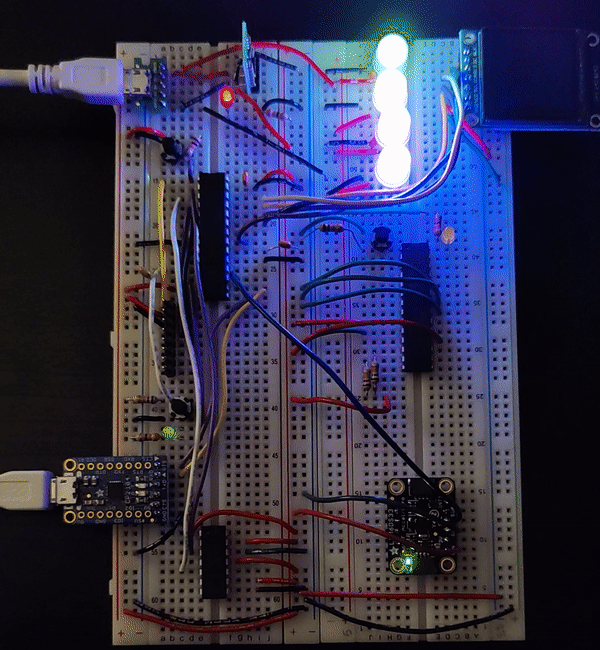
Although similar functionality could be achieved through purchasing a pre-made Arduino (or similar) based microcontroller board, the process of connecting and interfacing with various peripherals from scratch has given me a much more in-depth and intimate understanding of how each component functions.
Instead of using the Arduino framework or any PIC32 libraries, I programmed everything from scratch in C. This helped me to learn how to write low-level code for various communication protocols from scratch such as UART, I2C, and SPI. Another useful technique that required me to code at a very low level was bit-banging, which was used to produce the rainbow affect on the Neopixel LEDs. Furthermore, this project gave me the opportunity to learn PCB design in Eagle, which is an essential skill to have for electronics design projects.
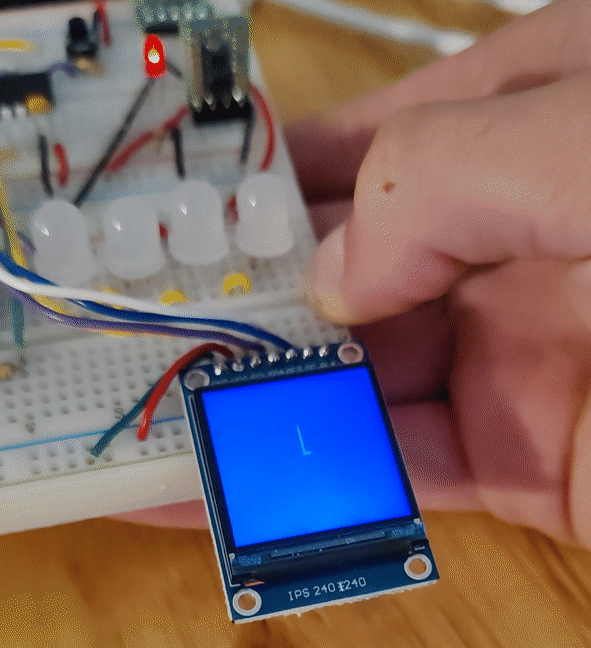
IMU Data Visualization on LCD Using I2C
Below is a video showing a demonstration of the PIC32 microcontroller, IMU, and LCD functioning together to produce an animation to display the IMU data. The line is drawn on the screen proportional to the angle the sensor is tilted. The sensor data is transmitted using I2C communication.
Generating a Moving Rainbow with LEDs
Without additional hardware to control the Neopixel LEDs, using a GPIO pin on the PIC32 microcontroller for bit-banging was required. Therefore, I wrote code to generate a signal corresponding to the timing specified in the datasheet to get each color on the Neopixels. Then, I phase shifted the signal on each LED to get the moving rainbow effect shown here.